Showing posts with label polymer clay. Show all posts

Tuesday, August 2, 2011

The scary doll and other tales.

The scary doll's wabbit.
I realized with horror that my last post was in May. MAY! Where'd June and July go?? Oh, well let me tell you a few things I've learned. One: you want to have a booth or table in a show? You better realize you do at least 6 months in advance or all the spots are taken. I've been really lucky and managed to find the applications to shows and festivals a week or two before they are due. Two: some people actually do take your business card AND contact you in a few days. I always thought that was just a line people say to be polite. Three: Heat waves and polymer clay are not good bedfellows. We had a week where the clay felt like melting chocolate. I couldn't sculpt with it and it kept me craving dark Lindt truffles.

Well insert montage music here and allow me to recap the highlights of the past 2 months. :D If you care to go beyond the pictoral feast, I've included captions! Yay!

HAPPY BIRTHDAY JANNA! (she turned old on July 29th) Ok - about the doll. No. She's not a faery. No. I cannot pay for anyone's therapy bills for viewing her. But yes, Janna has these sort of tastes at times. Janna is my best friend and needed a doll to act out all her Tim Burton-esque fantasies with. The wabbit at the top of the screen is the polymer clay "rag" doll in this doll's arm. This doll was sculpted with a mix of polymer clays, air dry ceramic, paint, fabric, vintage lace, llama wool and the theme to Coraline as well as the Dresden Dolls stuck in my head. 
This gnome is my tiniest yet. Seriously. The bottle is only about an inch long inside. I've been having fun making very tiny miniature scenes. Gnomes are my favorite. This one comes complete with house and flopsy ferns. ^_^ Photograph courtesy of Andrea Pirkey.

This lovely vessel was handmade by Jason Powers of Powers Art Glass. With a tiny needle, I sculpted the grass, mushrooms and little faery to fit inside. We made a couple of these fantasy vessels; another contains a gnome! As far as I know, this little cutie is still for sale.
My newest faery baby. :) I can't believe I'm up to 23 of these little cuties! 

This fire phoenix was one of my favorites. I hand carved each feather and placed them individually. This was one of those instances where I found an item and instantly saw a sculpture in mind for it. This was a large, gorgeous daisy from a fabric store.
This baby sold a while ago - I just always loved this picture. ^_^
My "Naturally Shed Faery Wing Necklaces" have been fun to make this summer. They catch the sunlight so well and I was thrilled to actually see someone I don't know at the post office the other day wearing one! The metal is silver plate, but I also made some in sterling silver for a gallery in Chicago, IL. I'm thrilled to be there! :D

Friday, May 13, 2011

New OOAK faerie! - "Oliver's Snail Mail"


"Oliver's Snail Mail"

Faeries can deliver mail at the speed of magical wings - be sure to specify "air mail" for that service. For all else, there's snail mail. This is Oliver's first job. He's already gotten rather used to the pace.


This art doll sculpture started with a large shell. I'm sure it's some sort of seashell, but it just screamed "garden snail!" to me. I thought about turning the shell into a garden gnome house with a little chimney and a lawn, but I wasn't in love with the idea. It sat on my shelf at the studio collecting dust for at least 2 months before I decided to create the snail that went with it just to see what it would be like with some clay breathing life into it. Once I formed that bizzare little critter, I was on a roll. I saw a mail bag, letters all over the place and a faery fast asleep on the mail bag as he delivered urgent letters. Hence, Oliver was born. ^_^

Oliver will probably go in my Etsy shop later in the week, but for now, you can also view him up close at Riverview Artist Mill if you're in the NH area.

(by the way - Charly, if you read this, I posted my letter to you this way. You should recieve it... soon? heh)

***NOTE: I'm doing a raffle for a wicked sweet handmade faery wing pendant for anyone who comments on my blog this week. See the bottom of my previous post for more details on the contest!****

Tuesday, April 19, 2011

"Shaelin's New Nest" - OOAK Faery

 Warning: photos really don't do this sculpture justice. Honestly, her face, clothing and the bird look much better in person. That being said...

Yay! I was actually able to complete a concept I had locked in my otherwise scatterbrained head for over a month now. I started with the concept of a faery trying to hoist a bird out of the nest, much to the bird's annoyance. That was followed a few weeks later by a trip to the art store to buy the nest. I mean, have you actually sat down and tried to make a bird's nest for yourself? No really. Have you? Not. Fun. Aside the nest, the rest of this art doll sculpture is completely hand made. As usual - no molds.


I started with the bird's armature and then completed the bird before moving onto Shaelin's armature. In my original thought, I had pictured a much smaller faery, but realized her arm span would have to be grotesquely ... lengthy. lol So there you have it. Shaelin was created to be about 7 inches tall if she were standing upright. Her face is about the size of an American nickel.

Penny is actually touching her hair - it's not in the foreground.

I think she's related to Tara from "Tara and the Toad", as she's rather impish and loves causing mischief for small critters.

Her wings are hand made just like all my other faeries. This time, I added brass filigree (hard to see in the photos, sorry) and brown jewels. I decided to go wild with some swirls at the "ribbing" and I think they turned out awesome.
Gotta love faery wings!

On another note, if you're in the Southern NH area, google map 29 Howard Street in Wilton NH and make a large red permanent marker note on your calender to be there between 10am to 4pm on Mother's Day weekend!! It's the Riverview Artists' Mill's open studios. Lampworking, bead supplies, pottery, silver and gold smithing, water color painters, energy workers, soap makers, dresses.... oh... and my sculptures! Will all be there. ^_^

Lastly, I'd like to thank Lori Ferguson  for featuring me in her awesome art blog, Madd Dogg of Tomorrow. Be sure to check out, comment and subscribe! Later in the week, I'll be featuring her work here on my blog (been meaning to do that with a lot of my favorite artists, jewelers, and otherwise totally cool people).

Saturday, April 2, 2011

Green Girl Boxes - without the boxes? Oh dear....

The first polymer creations I started my business with were whimsical takes on the Green Man - my "Green Girls". So called because for a while in the beginning, all my faces looked rather feminine no matter what I tried. These are humanesque faces that I sculpt completely by hand - molds are for wimps! (just kidding, I love all clay artists. Even moldy ones.) Then I cut out and vein tedious little maple, birch and (sometimes) oak and ivy leaves by hand with a little knife and arrange them as I see fit around the face. After the sculpture cures, I paint them to give the illusion of tarnishing copper.

These sculptures are great in shadow boxes to adorn a wall, but more popular are my jewelry type boxes. I started purchasing lovely, affordable wooden boxes with magnetic clasps from a craft supply store back in October. They are the perfect size and great quality for my needs. I stain the boxes, create free hand celtic knotwork on 2 sides and the front with green and gold paint, glaze the box, felt it, and then crown it with an original green girl.

My problem now, is that after all these months, with 2 shops keeping them in stock and at least 2 other shop keepers interested in carrying them, I can't get those perfect blank wooden boxes any more! I used to use larger boxes with base metal clasps before I went to these little magnetic ones. I'd rather not go back to those boxes because I feel the clasp just doesn't match as well as it should. Scallop shell base metal with celtic knots? Eh. But now I'm at a loss of what to do aside take up wood working. Anyone know where I can get a cheap lathe and a few acres of birch?

If there's anything I've learned from this, it's to not rely on a single supplier for what will be a staple item. Now I'll have to find replacement boxes and I'm a little nervous that those who wanted these exact types won't be that happy with them/me.
This was my first box sold online. It's small and hexagon in shape - it was very hard to work with when it came to painting the little knot and felting it inside. I hope I don't have to return to these!

Tuesday, March 29, 2011

Back Claying Again - The Littlest Mermaid

I suffered a severe case of clay withdrawal these past two weeks. For those who didn't know it, I've been recovering from an eye injury and consequent surgery. As such, I've been one-eyed and not up to creating my little creatures. :( Today, I was well enough to return to the artist mill and actually get some work going!
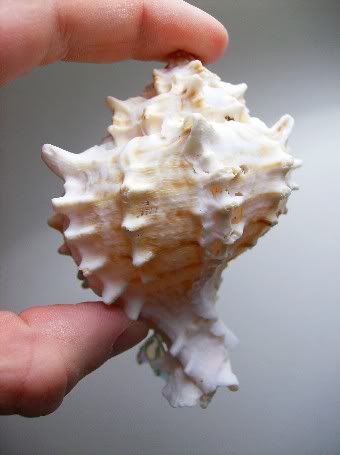
Just a shell? No, this is not clay. But it's not just a shell either...
 My eyesight becomes rather blurry and dizzy when I try to focus on tiny details, but that didn't deter me from trying to create something with some seashells I found. Here was the result of my claying today (playing + clay = claying). The seashell is only 3.5 inches long (8.89 cm). It's an original idea as far as I know. I've seen shells with faces sticking out of them from other artists, but never an entire tiny mermaid.
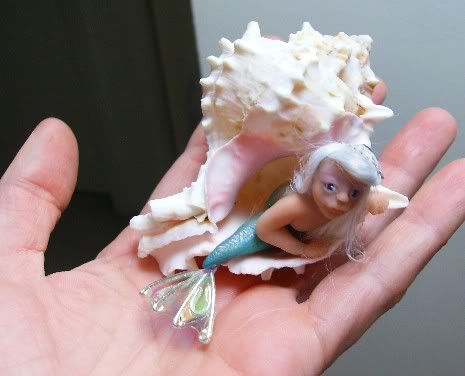
Flip it around and you've found her - my littlest mermaid yet. ^_^

I created this little shell mermaid out of polymer clay. It's hard to tell from the photos, but she is reclining doubled up - her bottom tucked back into the shell. No molds, like usual. Her hair is that horrible viscose stuff that I hate It gets EVERYWHERE! And it doesn't like to stay soft and realistic if you use mousse or water to style it. It was all I had to work with today though and I was impatient to finish her. Her tail is painted with a blend of oil paints and acrylics. Her tail fin is silver plated copper and a mint green film.
Just to give you a better idea of her size. I was discouraged when my eyesight completely lost all focus when painting her eyes! I really hope my eye heals soon! D:

Tuesday, March 15, 2011

If I can't grow flowers, I'll make 'em! (Or make faeries for them)

I like little ole Milford and the apartment my father and I have lived in for the past 11 years. However, living in a second story flat has its downside.... no garden!! Granted, my balcony looks like the Hanging Gardens of Babylon every summer thanks to my ambitious green thumb, but for years I've dreamed of having my own, real, in the earth garden. I even doodled sketches last year in hopes that I might secure a little plot somewhere. If Milford has a community garden, it's well hidden. I finally put two and two together today when I was drawn yet again to silk flowers in the craft store.

For those who know my work, you know I'm creating an OOAK fantasy flower line ('ooak flower spirit' to be precise). This came about when I fell in love with some awesome blue tiger lilies at Michaels Crafts floral department. With a tag saying 50% off the hefty priced flowers, I bought myself a new inspiration! You may recognize this little gem of a sculpture from my Etsy shop (listing here) or one of the dozen treasuries she's been in. (Thank you etsy curators! You all rock!)

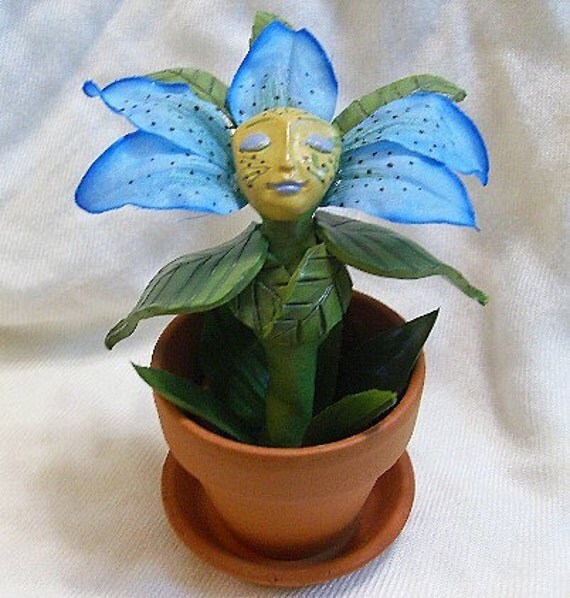
I loved making her and just had to keep going. With another idea planted in my head, I created this next lovely; a fantasy style orchid. I improved a little I think. The only parts of her that are not polymer are her leaves and the terracotta pot she graces. She found a perfect home. :3

I have so many ideas for flowers now that my imagination is like a stuffy greenhouse. Everything from elegant and intricate to comical and cartoonish all stuffed in that little nut I call my mind. Check out my Dandelion ... get it? Dandy-Lion? Ok, so it looks a little more like a puppy in a lion's mane. I plan to keep the idea but rework the face.

Then I drifted back to that darned floral department. I just finished my Captive Mermaid and wanted to get back to practicing my faeries. But another flower! And there's still snow on the ground! Another flower wouldn't be a bad thing, I convinced myself, much influenced by the new 60% off sale (those sales kill me!). I bought a big lavender colored bloom. I'm not sure if it's fashioned after a real flower. It sat in the studio with me for a while and I was torn between using it to create a new flower or making a baby to sleep in it. Well... here's the winning idea. This adorable baby is a lot like my adult faeries - all hand sculpted without the use of molds. The wings are hand made too.
And of course, the big flower was just too soft and inviting not to have a faery baby snuggling on it!

Monday, March 7, 2011

The Tiny Captive Mermaid - Would you like to barter?

She'll give you amethysts and pearls in exchange for her freedom.
I've been told sketch artists, painters and illustrators can see the picture on the blank page or canvas before they even pick up the pencil. While that certainly doesn't work out for me (as soon as I place a mark on the paper, what I see vanishes! Poof!) That concept does seem to be true with me and polymer clay however. One of the lovely things about a colorfully bizarre childhood and an imagination that refuses to comply the date on my birth certificate, is that I have some rather vivid concepts and can see them clearly in the first instant.
This OOAK mermaid is about 6" and hand sculpted without molds!
My focus at present is on fairies, but when I saw a little fish bowl in the local dollar store, my mind immediately saw a sad yet fantastical mermaid hanging over the lip and holding treasures to try to barter her way back home. I imagined the child who caught her in the tide pool won't take her offerings, so the point I captured the image is her semi-resigned to her fate.

She is hand sculpted of polymer clay, hand painted with a blend of oil paints and acrylics and decked out with glass beads, freshwater pearl and amethyst. Her bowl is deceptively void of water, but contains a real Atlantic sea sponge I found at the coast a few weeks ago, and shells from that same trip, all secured in 'wet' looking glass pebbles. You'll soon find this little creature in my etsy shop.
I'd really love to know what everyone thinks!

Sunday, March 6, 2011

Ash's Treasure - #1 from my OOAK Faery Collection

"Ash's Treasure"
#1 of The Silver Branch's "OOAK Faery Collection"
Created in January 2011
Not For Sale

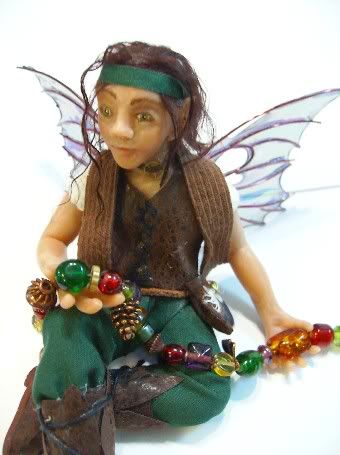
Ok, I've seen far better. That self-depreciation out of the way early on, I will go on to say that while not nearly perfect, Ash is my first figure since I started claying again, and I'm rather fond of him. Sitting height: about 4 inches tall.

EVERYTHING was a learning experience! I learned a lot through Ash. First off, it should be noted that I'm not a fan of molds - so no molds here - all the clay is hand sculpted. I created him at the Riverview Mill, a place where free internet access is nothing more than a beautiful dream unless you sit in the parking lot, so I had no tutorials or images to help guide my figure forming. But aside that, the wings, the clothes, the hair - all a learning experience from scratch.

What everyone seems to like about him the most is his wings... probably the easiest part  to make in all honesty. Ah well. I have to admit, when I saw the amazing creations of my fellow artists in cyberspace, I was dazzled and enchanted by their wings too. It's one of those magics, that once you know what they are and how to make them, they significantly lose their luster. I won't jade you here - you want to know more about them? Shoot me an email. But, trust me, it's best to live with magic than without it. I will say that they are made with open flame - how can you not have fun with that? I make faery wing earrings too - check my etsy shop if you're curious.

His clothing taught me something else - ribbons are probably easier to work with instead of full swaths of fabric, and that I am easily frustrated when creating tiny clothes. How do all you art doll, barbie, miniature and figurine seamsters do it?! I loathe the idea of smearing glue all over the figure and sticking cloth to it. Ash's clothing is all painfully and clumsily hand stitched. His pants were the worst to make because of the way I positioned him. Heather from "My Sister's Closet" was a huge help and I eventually managed to create something presentable after a few hours - a few hours! Yikes! Anyone know any good doll clothing makers I could team up with? lol
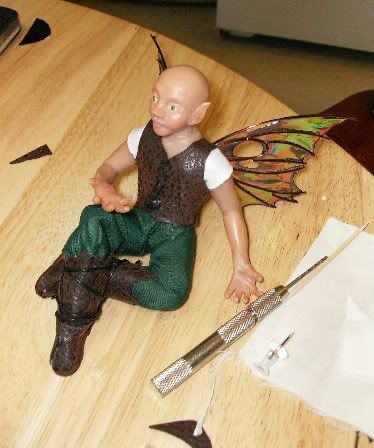
Oh where, oh where is my hair?
His hair, while rather a fright in the end, was the product of impatience. I should have tried putting hair on a practice head first, but Ash was sitting finished and waiting for his hair for over 2 weeks. I just had to cover him up. I tried llama fiber on a practice head weeks before. It was a mercy that I did too because it didn't work. I needed llama wool straight from the fleece. I needed Tibetan Llama wool. It's tiny ringlets and fibers feels so real to how I imagined a tiny person's hair to feel, that it's well worth the wait for it to ship in from New Zealand. I order from Dollworld. So friendly and fast despite the distance. For some reason, that lovely country of LOTR was the only place selling TIBETAN llama wool. O.o Funny world, ain't it? Well, it's so fine that the special glue I use to attach the layers of hair to his scalp has a habit of leaking through the layers. Hence the girly headband. Now I had pipettes and precision syringes, so I'm hoping that is a flaw of the past.

But there you have it. Ash! And his treasures? That's an old bracelet I beaded for myself (to match one I made for my lovely friend Libby) and is now safely under Ash's guard. I also made for him a tiny leather pouch hanging from his belt. The pouch is adorned with a brass bell and a tiny head feather from my father's parakeet, Fleur. Inside? 4 raw garnets I mined from Wilton, NH. :)

How I started making Faeries

"Ash" - What a learning experience he was!

My focus at present seems to be on practicing polymer clay faeries. Yeah, I do spell 'fairy' in that geeky 'epic, fantasy' like way. Truth be told, this was the old english spelling and dates from texts at least as far back as the 16th century, so it's not as new age as many make it out to be.

Now where'd I get this desire? I do love my 'green girl' faces and faery doors and haven't abandoned them, I promise. But I've always had 'a thing' for faeries. It was about 2 years ago that I took a little ball of clay and tried to follow an online tutorial on how to shape it into a baby's face. I still have that rather scary baby. As you can see from the picture of it below, I was inspired from that point on to give polymer clay a long vacation: no pay and no guarantee that there will be work for it again once it returns.
About 6 months ago (maybe less) I picked up a pack of Sculpy again... mostly out of boredom I think. I was battling the worst kind of writers block. It was the kind where you have an amazing plot, and even characters to boot, but no idea where to start the whole darn thing! I needed some sort of release. I made a dragon. Note about Sculpy III - it breaks at the very thought of tapping it. Brittle, powdery bits of a young dragon all over my car! Well, I moved onto Super Sculpy. I made faces with leaves around them and painted them to look like antiqued copper and sunlight speckled forest canopies. My 'Green Girls' (so called because they look like the Green Man, but I always saw them as too feminine) I flatter myself that I grew better at making faces. Still, I remembered my little baby faery and put full figures on the back burner. I made faery doors, started a flower nymph collection (working on flower #3! Wooo!), gnomes, jewelry. Finally, I decided to try it out. I took some wire and created an armature.
Watch out for my upcoming blog post all about my first somewhat decent OOAK (one of a kind) polymer faery - Ash.